
Injection molding is one of the most widely used manufacturing processes for producing plastic parts. It’s a complex procedure that requires meticulous planning, precise design, and knowledge of the intricacies involved in mold design. A well-designed mold is critical to the quality of the final product and the efficiency of the entire manufacturing process. Whether you are a mold designer or a company looking to partner with a manufacturer, understanding how to design a mold for injection molding is essential.
This article will provide a step-by-step guide on mold design for injection molding, with insights into best practices, key design considerations, and expert tips to help mold designers improve their skills. By mastering the art of injection mold design, designers can produce high-quality parts, minimize costs, and maximize productivity.
1. Understanding the Basics of Injection Molding
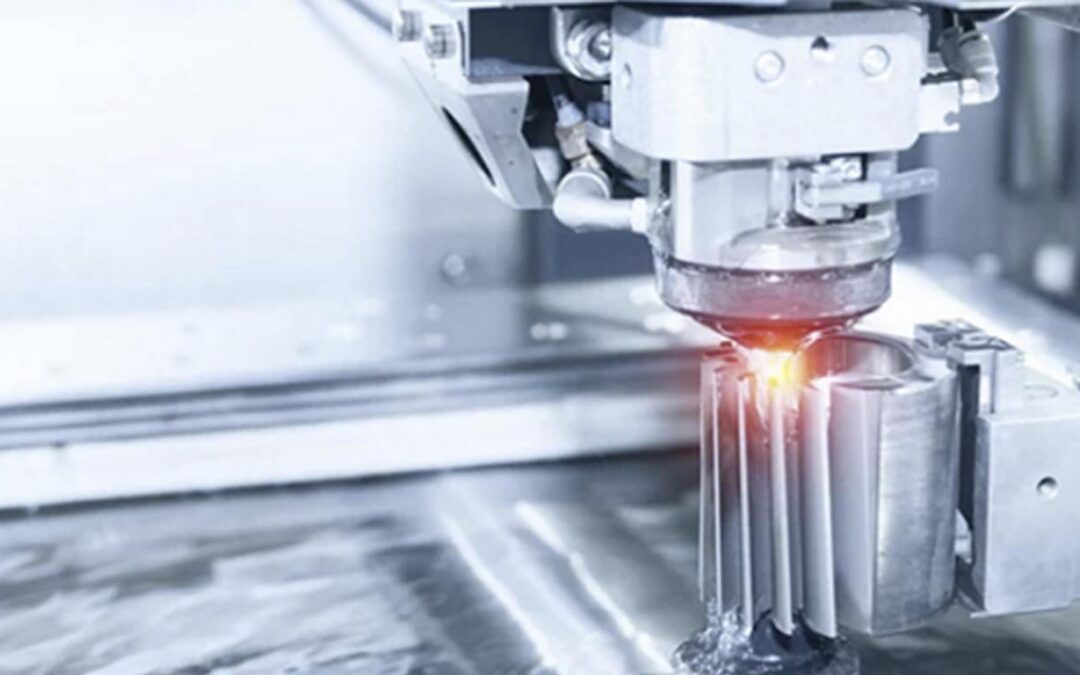
Before diving into mold design, it’s important to have a clear understanding of the injection molding process. Injection molding involves injecting molten plastic into a mold cavity, where it cools and solidifies to form a final part. This process is highly efficient for producing large volumes of identical parts and is used across industries such as automotive, electronics, and consumer goods.
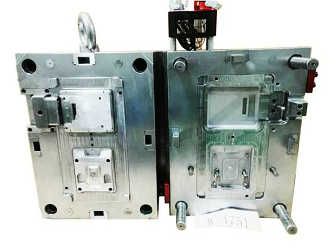
A mold for injection molding typically consists of two halves: the cavity side (female) and the core side (male). When the mold is closed, these halves form the cavity where the plastic part is shaped. Once the plastic is injected and cooled, the mold opens, and the part is ejected.
Key Steps in Injection Molding:
- Clamping: The mold halves are clamped together under pressure.
- Injection: Molten plastic is injected into the mold cavity.
- Cooling: The plastic cools and solidifies inside the mold.
- Ejection: The final part is ejected from the mold using an ejection system.
Importance of Mold Design:
A properly designed mold is essential for ensuring that parts are produced consistently, efficiently, and free from defects. Poor mold design can lead to problems such as warping, sink marks, or flash, all of which can impact part quality and lead to costly rework.
2. Key Elements of Injection Mold Design
Designing a mold for injection molding involves several critical factors, including the mold’s components, the materials being used, and the design of the part being molded. By paying close attention to each of these factors, designers can create molds that are durable, efficient, and capable of producing high-quality parts.
2.1 Mold Components
A mold is made up of multiple components, each with its own function. Some key components include:
- Cavity and Core: These are the two primary parts of the mold that shape the plastic part.
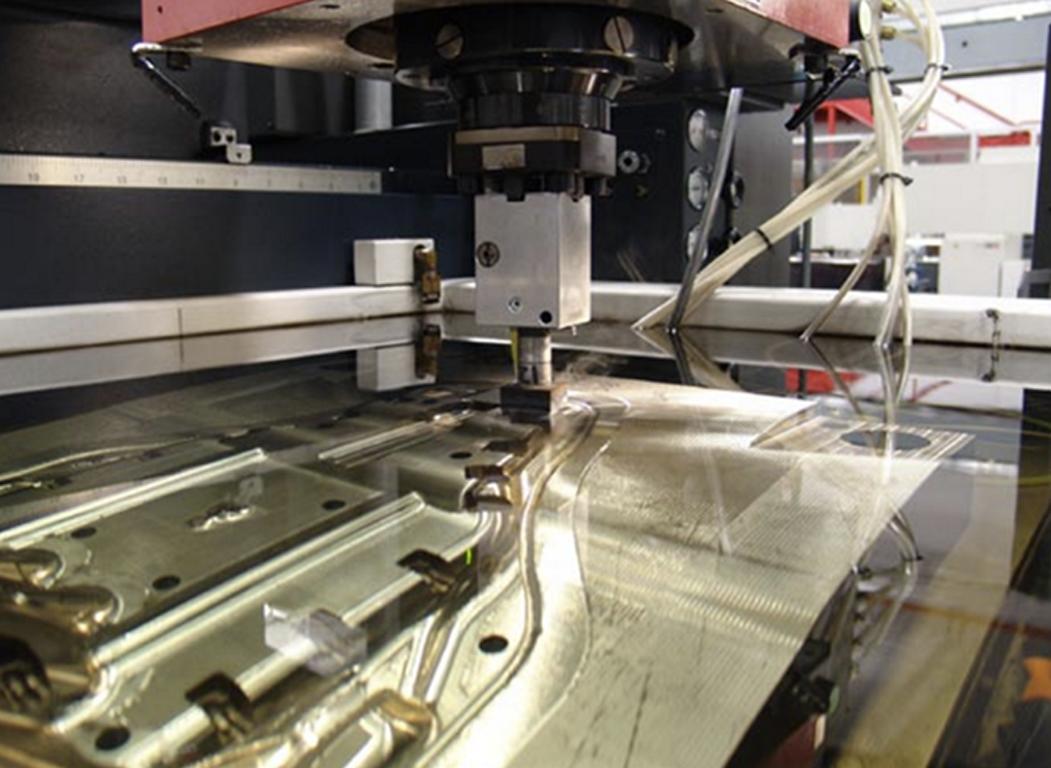
- Sprue, Runner, and Gate: These components guide the molten plastic from the injection unit to the mold cavity.
- Cooling Channels: Used to cool the molten plastic and solidify the part.
- Ejector Pins: These pins push the finished part out of the mold after it cools.
2.2 Material Selection
Choosing the right material for both the mold and the part being molded is crucial. The mold itself is typically made from steel or aluminum, with steel offering greater durability for high-volume production and aluminum being suitable for prototypes and low-volume production.
For the part, plastic materials such as ABS, polycarbonate, and polypropylene are commonly used, depending on the application’s requirements, such as strength, flexibility, and temperature resistance.
2.3 Part Design and Mold Considerations
The design of the part plays a huge role in determining the mold design. Complex parts with intricate details may require multi-cavity molds or additional features such as lifters and sliders to achieve the desired shape. It’s important to consider the following:
- Parting Line: This is where the two halves of the mold meet. Choosing the right location for the parting line is essential to avoid visible defects.
- Shrinkage: All plastics shrink as they cool. Mold designers must account for this shrinkage when designing the mold cavity.
- Tolerance: Precision is critical in injection molding. Tolerances must be defined to ensure the part fits and functions as required.
3. Designing for Manufacturability
Designing for manufacturability (DFM) is the process of optimizing the design of the mold and the part for ease of production. This involves taking into account factors that can affect the molding process, such as material flow, cooling, and ejection.
3.1 Draft Angles
A draft angle is a slight taper applied to the walls of the part to allow it to be easily ejected from the mold. Without sufficient draft, the part may stick to the mold, causing damage or defects. The recommended draft angle is typically 1-2 degrees for most parts, but this can vary depending on the material and design.
3.2 Wall Thickness and Uniformity
Maintaining uniform wall thickness is essential to avoid issues such as warping and sink marks. Uneven walls can lead to inconsistent cooling, which in turn can result in internal stresses that distort the part. Ideally, wall thickness should be kept as uniform as possible, with gradual transitions to thicker sections.
3.3 Rib Design and Strengthening Features
Ribs are commonly used to reinforce parts without adding excessive material. When designing ribs:
- Ensure they are not too thick, as this can cause sink marks.
- Keep rib height less than five times the wall thickness.
- Use fillets to avoid sharp corners, which can lead to stress concentrations.
4. Gate Design and Placement
The gate is where the molten plastic enters the mold cavity, and its design and placement have a significant impact on the quality of the part.
4.1 Gate Types
There are several types of gates used in injection molding, including:
- Edge Gate: The most common type, located on the part’s edge.
- Submarine Gate: Used for automatic de-gating, this gate is located below the parting line.
- Pin Gate: Used in multi-cavity molds for small, detailed parts.
4.2 Best Practices for Gate Placement
The gate should be placed in a location that allows the molten plastic to flow evenly into the mold cavity. It’s essential to:
- Avoid placing gates in areas with fine details, as this can cause blemishes.
- Position gates to allow for smooth material flow, minimizing air traps and flow lines.
- Use multiple gates for larger or more complex parts to ensure even filling.
5. Cooling Systems and Cycle Time
Cooling accounts for the majority of the cycle time in injection molding, making it one of the most important aspects of mold design.
5.1 Importance of Cooling in Injection Molds
Efficient cooling ensures that the part solidifies uniformly, preventing defects such as warping or sinking. If cooling is too slow, cycle times increase, reducing productivity. If cooling is uneven, the part may warp or experience internal stresses.
5.2 Designing Effective Cooling Channels
To optimize cooling:
- Use conformal cooling channels that follow the shape of the part, providing more even cooling.
- Place cooling channels as close to the part surface as possible without compromising mold strength.
- Consider using baffles or inserts in areas where it’s difficult to place straight cooling channels.
6. Ejection Systems and Techniques
The ejection system is responsible for removing the part from the mold once it has solidified. A well-designed ejection system is essential for ensuring the part is not damaged during ejection.
6.1 Types of Ejection Systems
Common types of ejection systems include:
- Ejector Pins: These are the most commonly used method for pushing the part out of the mold.
- Air Ejection: Air is used to gently push the part out of the mold.
- Stripper Plates: These plates apply even pressure to the part, minimizing the risk of damage.
6.2 Avoiding Common Ejection Problems
- Ensure the part is adequately cooled before ejection to prevent deformation.
- Use sufficient draft angles to allow the part to release easily from the mold.
- Make sure ejector pins are placed in areas that won’t cause marks or damage to the finished part.
7. Tips for Avoiding Common Mold Defects
Injection molding can produce high-quality parts, but there are several common defects that can occur due to poor mold design.
7.1 Warping
Warping occurs when different areas of the part cool at different rates, leading to distortion. To prevent warping:
- Ensure uniform wall thickness.
- Use proper cooling techniques.
- Design the part with adequate support structures, such as ribs.
7.2 Flash
Flash is excess plastic that escapes between the mold halves. It can be prevented by:
- Ensuring the mold is properly aligned and clamped.
- Using the correct injection pressure.
- Regularly maintaining the mold to prevent wear.
7.3 Sink Marks
Sink marks are depressions that form on the surface of the part, typically due to uneven cooling. To avoid sink marks:
- Keep wall thickness uniform.
- Avoid thick sections in the part design.
- Use proper rib design to reinforce areas without adding too much material.
8. Injection Mold Cost Optimization
Designing a mold for injection molding involves upfront costs, but there are ways to optimize these costs without compromising on quality:
- Use standard mold components where possible.
- Design multi-cavity molds for higher production volumes.
- Consider modular molds that can be adapted for different parts.
- Work with a skilled mold designer to minimize trial and error during production.
9. Working with an Injection Molding Partner
Whether you’re designing molds for in-house use or working with an injection molding partner, selecting the right manufacturer is critical.
9.1 Factors to Consider When Choosing a Manufacturer
When selecting an injection molding partner, consider the following:
- Experience and Expertise: Choose a manufacturer with a proven track record in your industry.
- Capacity: Ensure the manufacturer has the capacity to handle your production volume.
- Quality Assurance: Look for a partner that offers comprehensive quality control measures.
- Lead Times: Evaluate the manufacturer’s ability to meet your deadlines.
- Cost Efficiency: Consider the balance between cost and quality to ensure you’re getting the best value.
9.2 UK vs. China Injection Molding Partners
Both the UK and China offer excellent options for injection molding partners, but there are key differences to consider:
- UK Manufacturers: Known for high-quality production, shorter lead times, and closer proximity for UK-based businesses, but costs are typically higher.
- China Manufacturers: Often more cost-effective, especially for high-volume production, but longer lead times and potential language barriers can be challenges.
10. Conclusion
Designing a mold for injection molding is a complex task that requires attention to detail, knowledge of materials and processes, and an understanding of how design choices impact production. By following the guidelines and best practices outlined in this article, mold designers can improve their skills, produce higher-quality parts, and optimize costs.
Whether you’re a mold designer looking to refine your craft or a company seeking an injection molding partner, understanding these fundamental principles will help you succeed in the competitive world of plastic injection molding.